Showing posts with label kid stuff. Show all posts

Wednesday, February 01, 2012

Fun & Frugal Hello Kitty Party

It was all about Hello Kitty this past weekend as we celebrated my little girl's 7th birthday. Instead of using the Hello Kitty party supplies available at the store, I decided on a pink, black & white theme with Hello Kitty scattered throughout. It is much cheaper to buy solid colored paper plates (black) and napkins (pink with white polka dots) than to buy the Hello Kitty embellished party ware. We used fabric, sheets, tissue paper flowers, cardstock that we already had on hand to complete the look! For games, we played musical chairs, freeze dance, and pin-the-bow on Hello Kitty. We put on HK tattoos and enjoyed a tasty lunch of finger foods like cheese, sausage and crackers, fruit kabobs, pigs-in-a-blanket, and mini pb&j sandwiches. Everything was designed to be fun, frugal, and well, a little fabulous.

:: Homemade Table Centerpiece - Tablecloth is a flat sheet with a zebra print fabric remnant laid over the top. ::

 :: Hello Kitty Birthday Banner - Created with a Sizzix Big Shot ::

:: Close-up of Hello Kitty on the banner ::

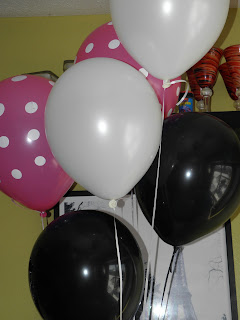
 :: Helium Balloon Bouquets from our local dollar store. I purchased the pink polka dot balloons at a party store & brought them to the dollar store to be filled. ::


:: We played pin the bow on Hello Kitty as a party game. It was great fun! I created this poster using the "grid" method. ::

:: My mantle is ready for the party! ::

:: The birthday girl is ready to party in her HK tshirt and her HK handmade hairbow. ::

:: The birthday girl and her girlfriend who slept over the night before the big party. It's not all the decoration or food or presents, but the special people that make these days extra-special. ::


:: Homemade chocolate cupcakes with pale pink frosting, silver sugar glitter, and candy HK faces. ::

:: HK cake - White cake with fresh sliced strawberries and real whipped cream frosting. ::

:: Make a wish my sweet girl. I hope this day was as wonderful as you are. ::

Thursday, March 04, 2010

Sew and Sew: Disney Style

It's been a really long while since my last edition of Sew & Sew. I have been doing more creating, especially lately, so I thought I'd share some of my latest projects, particularly the ones for our upcoming trip to Disney.

I picked some Disney-ish fabrics to make the each of the girls a dress. I prefer the idea of creating the 'look' of Disney, as opposed to using Disney print fabric. These two dresses only required about 4 yards total of fabric, purchased on sale of course! For Sienna's dress I used my "go-to" pattern when it comes to little girls dresses (New Look 6613). I have made probably a dozen dresses from this same pattern with 2 more planned.


 I didn't want the dresses to be exact duplicates of each other, so for Tatiana's dress I chose a slightly more grown-up pattern, which I have used once already (McCall's 5574). I love this style, particularly because of the middle bodice section which allows for lots of fabric mixing & matching. Neither of the patterns called for ruffles at the bottom, so I just measured around the bottom edge and multiplied by 1.5 to get the length (you can do x2 for a fuller ruffle).


:: frayed fabric flower from this tutorial. For lotsa fabric flower tutorials visit here ::


:: detail of Mickey heads added to the ends of the straps. I tried several different methods, but the winner was just to trace/draw a Mickey head on a double layer of fabric, then zig-zag stitch with a really short stitch length (as in applique) around the inside of the tracing, then cut away the extra fabric close to the stitching. ::


 :: appliqued Mickey head. I'm not that great at applique, but I'm improving. ::

An old pair of Target jeans get new life as Disney capris!


:: I had to open up the inside seam of the leg to put on the applique and then sew it back up again. I think they still need "something". Maybe a patchwork belt or something added to the back pockets? ::


:: And just because I couldn't resist. ::

Friday, February 12, 2010

Fancy Five

Sienna turned five, so we got all fancied up. I was feeling especially creative, so some hand-made touches were an order!


We used Fancy Nancy as our theme, so we tried to make everything fancy!


:: Felt garland following this tutorial ::


:: Yes, I drew Fancy Nancy free-hand based on a image that I found on a sticker. ::


:: Fancy finger-foods ::


:: Fancy make-overs with body glitter & glittery hairspray. My brother (he'll be 30 this year!) even let me glitter his hair! ::


:: Fancy Nancy story time ::


:: Fancy homemade cake with pink frosting & white roses & sprinkles! ::


:: My fancy 5-year old ::

All photos are courtesy of Stephanie.

Monday, February 01, 2010

Cakes & Quakes

Our regular school routine was interrupted last week, but this week we are going to veer from our regularly scheduled program to learn about earthquakes and Haiti. We have already had some brief conversations about the devastation there, especially since the kids were asked to give some of their money at church to aid in the relief effort. Over the weekend, the littlest kids had a bake sale at church to raise money. Of course, we contributed:

 
:: my top-notch mixing expert ::


:: efficient & cute! ::


:: my quality control associate ::


:: everyone loves sprinkles ::


:: little fingers doing a big job ::


:: pretty & purposeful -- they were a hot-seller for the bake-sale ::

I left out the part where I tried a new sugar cookie recipe and lovingly mixed, chilled, rolled, cut, and baked and the blasted things turned out harder than a rock. Grrr. Next time, I am totally going to follow all the tips and recipes from this awesome cookie blog. But I digress.

This week we are making an earthquakes & Haiti lapbook. (Remember our first adventures with lapbooks?) I am using the free earthquake lapbook resources here and supplementing with good library books, good conversation, and good thoughts. I just love using real-life events or experiences to make learning come alive!

Have the recent events in Haiti spurred on any good conversation with your kids?

Monday, January 18, 2010

Dump Truck Cake: How-to


Choose a dump truck with a really big trailer and wash thoroughly. Check thrift stores and garage sales if you don't have suitable selection at home. My dump truck trailer measures about 9" x 6", roughly half the size of 9" x 13" sheet pan.


Bake your cake and cut to fit. If you want a layered cake, depending on the depth of your truck, you might have to bake two thinner layers or one bigger cake that you cut two pieces out of. Use as big of a spatula as possible to gently lift the layers and place them in the truck bed. An extra set of hands won't hurt either.


Even if it breaks a part a little, just put the broken pieces in to fit.


Add filling if desired. I layered some cool whip in the middle and placed the other half on top. You can see in the photo how that top layer crack in half, but I just squished it back together. No one will ever notice!


Frost with chocolate frosting. Since I was using what I had at the time, I only had about 1/3 can of chocolate frosting from a previous baking project, so I just melted that down and poured it over the top.

If you really want to make it look cool, crush some chocolate wafer cookies and sprinkle them over the top. A few gummy worms poking out here and there would be fun as well. I was not able to do this because of the extra ingredients it requires, but just love the idea.


Prepare to amaze your little trucker!


Monday, November 23, 2009

Home Ec Breakfast


Our home economics lessons have included a simple introduction to nutrition, how to use a peeler (I also supplemented with some knife skills), and last Friday, our lesson was on using a toaster. I love how thorough the instructions are (i.e. don't forget to dry your hands after washing and count to twenty before removing the toast from the toaster). The featured recipe was for Cinnamon-Sugar Toast, which proved to be easy enough for my student to prepare and delicious enough for all the kids to enjoy!


In case you want your little ones to try this at home, it's as easy as mixing up some cinnamon sugar (about 1/4 c. and 1/2 t. cinnamon more or less) and spreading some butter on fresh toast. The lesson also has the parent checking the toaster settings, making sure the child has washed his/her hands before preparing the meal, counting to 20 before removing the toast, and waiting 5 minutes before putting the toaster away. This makes for an easy cooking lesson and a quick & tasty breakfast.

Do your kids spend a lot of time in the kitchen with you?